

Okay, so maybe I'm a bit late with this trend, but still I think it's cute enough to make a post for it even though it's been around for a while now. Maybe you've seen this before... Maybe not. The animal-eared headbands, and the cat ones in particular!

I think it looks really cute and I'm really happy to see both kpop idols as well as western pop singers sharing a trend! I got a pair of adorable pearl-bear ears, but I really wanted a pair of cat ears as well. But because I couldn't find it where I live, and I'm not patient enough to wait for it to arrive when I buy it online, I decided to make some myself! And it's actually really really easy!
Here's what you'll be needing to make your own pair of cute cat ears!

A plain headband
Some pearl-beads
Wire that's strong enough to hold the beads and thin enough to fit through them
Strong glue
Pliers (One to cut, one to bend and one to pinch!)

Step one. You're going to cut off some wire. Don't take too little, you can always take some off again if you're not satisfied. Then, take another section that's about the same length as the first one.
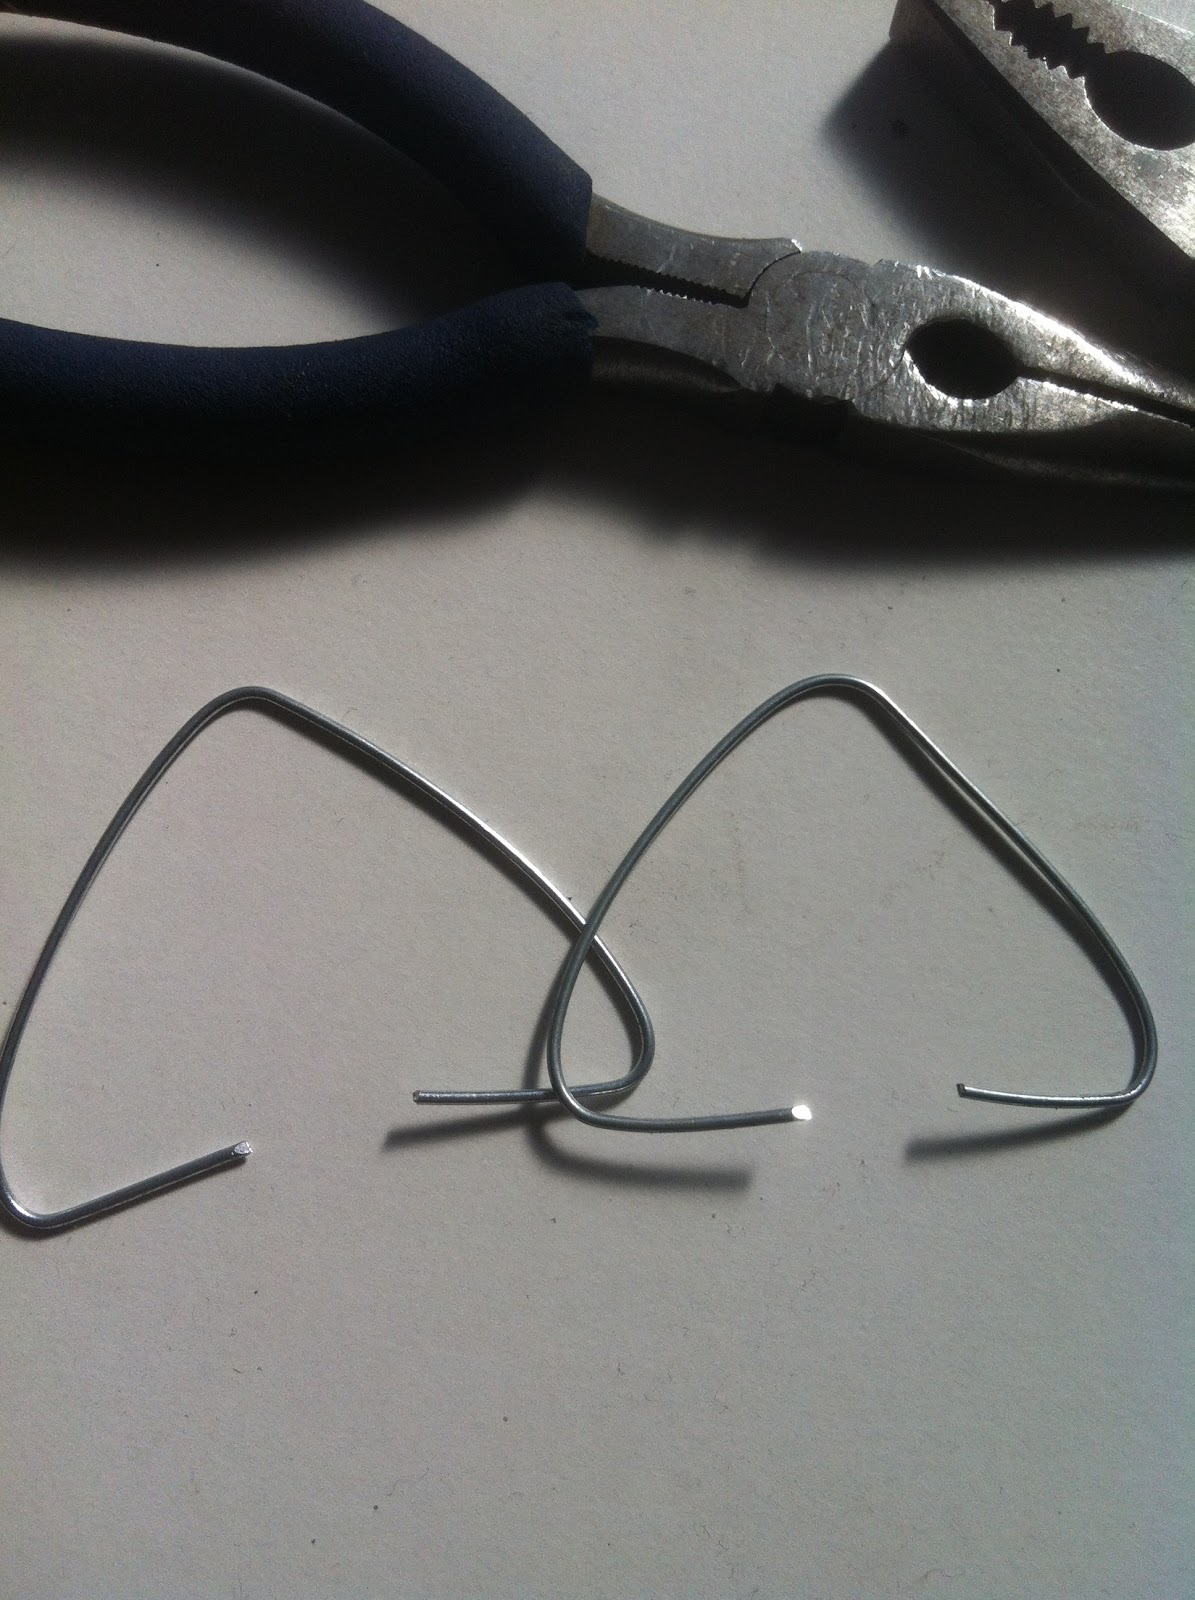

Step two. Using a round edged plier, bend the middle of your pieces of wire to create a corner. You can make this as sharp as you want to depending on what you think looks the best. Then, bend the left and the right side of the corner you made to create the triangle shapes of the cat-ears.

Step three. Use the pearl beads, or any decoration you want to use to cover up the wire. Some cat ear headbands only have a couple of pearls, but I decided to cover the entire ear's outline in pearls and since I used beads, it was very easy. However, if you don't want to use as many pearls, you can just use some glue to stick the decorations to the ears.

Step four. Secure the ears onto the headband. I tried using some wire to tie them on there first, but that didn't work out for me because I'm not strong enough to pinch the wire tightly enough to keep them in place. Instead I used some ribbon, glued it to the headband and then tied it around the wire to keep the ears in place. If you're using this method, make sure to wrap it tightly, otherwise your ears are going to flap forward when you wear them.

And there you go! Your very own home-made cat ear headband! Please feel free to leave a comment or a request right here, or on my Facebook page! Also I'd love to see your creations, so don't be shy and send me a picture if you decide to make one of your own~ Thanks for stopping by at my blog! Like my Facebook page for updates and subscribe to my Youtube channel for video-tutorials and more!
Have fun making your headband and take care!
<3,
May.
thats good idea
BeantwoordenVerwijderen